

5 wheel arch cleaning mistakes that damage the arch lip
You wash the car, give the wheel arch a quick blast and everything looks clean. Wet, the arch lip always looks good. Only once it dries does a grey line of sand, brake dust and salty water show up. That folded edge is exactly where rust starts on a lot of cars, the kind you end up paying to have repainted years later. Where wheel arch cleaning actually goes wrong becomes clear with the very first point.
Five common wheel arch cleaning mistakes leave dirt, salt and moisture sitting on the arch lip or damage the protection inside the wheel well. Pre-rinse, spray properly, brush and rinse twice, and each wheel arch is ready for winter in about 30 minutes.
1. Just pointing the lance in leaves a dirt line on the arch lip
The most common wheel arch cleaning mistake is holding the lance into the arch from the outside for a few seconds, because that leaves a line of dirt on the folded inner edge of the arch lip.
It comes down to geometry. The arch lip is a sheet-metal flange folded inwards, and that exact crease collects a paste of sand, brake dust and road water. A jet coming straight in from the outside only hits the edge side-on and pushes the paste further in instead of flushing it out. While it's wet you see none of this. The grey stripe only appears once the car has dried, and by then the wash is usually done.
The fix is simple: aim into the arch at an angle from the front and from the back, and turn your wrist so the jet runs along the edge once. Turn the steering to full lock and you get a lot more room behind the front tyre. If a line is still there afterwards, work it out with a long detailing brush, not your finger, because the sheet-metal edge cuts easily.
Why this matters right now: in winter that dirt line turns into a salt depot. The paste stays damp after every drive through slush and holds salty water right on the flange, the one spot where the metal can be attacked from both sides. One proper clean before the first road salt means winter hits bare, dry metal instead of a soaked sponge.
In autumn you get leaves on top of that. The tyre flings wet leaves and pine needles into the corners behind the wheel arch liner, where they sit and slowly break down into an earthy mush. That mush holds water like a flower pot and can block the small drain holes in the front wheel well. So rinse out the upper corners and the transition to the sill as well, until the water stops running brown.
2. Brushing without a pre-rinse scratches the paint on the arch lip
Brush the wheel arch before you've rinsed out the loose sand and grit, and you drag those grains across the paint on the arch lip and leave fine scratches behind.
A wheel arch isn't just dusty, it's full of proper blasting media: sand, grit from the gritting lorries and small stones the tyre throws against the wheel arch liner on every drive. A brush picks up those grains and drags them over the painted edge on the next stroke. The narrow strip of paint right on the arch lip is most at risk, because that's where the brush head almost always knocks against it.
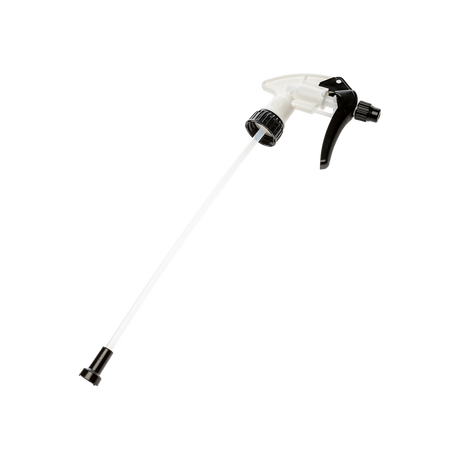
So it's water first, then chemicals, then the brush. Give the arch a rough rinse with the pressure washer until no more sand runs out. Then mist on the diluted cleaner with a pump sprayer such as the solo CLEANLine (303 A / B) Pump Sprayer 1.25 Litre in the 303 B version, which is built with EPDM seals for alkaline cleaners from pH 7 to 14 and puts out a fine, even mist at up to 3 bar.
For brushing along the edge, a long, metal-free detailing brush has proven its worth. The Koch-Chemie Wheel & Engine Brush 75 x 420 mm has a plastic ferrule instead of a metal one and a 420 mm wooden handle, so you can reach behind the fitted wheel without your wrist rubbing against the painted edge. When you work along the edge, keep your thumb between the handle and the paint, so your hand protects the paint rather than the other way round.
The order of the whole wash plays a part here too. Wheel arches and wheels always come first, before the paint. When you rinse, the grey water from the arch sprays all the way up onto the doors and sills, and on a car you've already washed that dirt would be straight back on the paint. Use a separate bucket and separate brushes for arches and wheels as well, so no brake dust ends up in the wash mitt you use on the paint.

3. Too much pressure from too close forces water into the flanges
A pressure washer jet from a few centimetres away doesn't clean any better, it forces water into flanges, seams and under the stone chip protection, where it takes ages to dry out.
A lot of parts meet in the wheel well: the wheel arch liner with its clips, the folded edge of the arch lip, the cables for brake wear and wheel speed sensors, the wheel bearing seals. A pencil jet from close range works its way under edges and clips, and whatever gets pushed in there doesn't come back out on its own. Wheel arch liners made of needle felt, which many current models use for sound deadening, also soak up water and stay wet for days.
As a rule of thumb, keep about 50 cm from the surface and use the wide nozzle instead of the pencil jet. Don't spray sensor cables and connectors directly at all, just rinse past them. Felt liners are better off with a stiff textile brush and a follow-up rinse with the garden hose than being drenched with a pressure washer.
Not sure which liner your car has? Just take a look: smooth, black ribbed plastic copes well with high pressure from a distance, while a grey, felty surface like carpet needs the gentler approach. Both get the same routine, only the pressure changes.
The area around the wheel hub is especially sensitive. Wheel bearings have sealing lips against splash water, but not against a hard jet from a few centimetres. If it hits the gap head-on, water can get into the bearing and mix with the grease, and months later that shows up as a hum in corners. Right next to it sits the wheel speed sensor for ABS and ESP, and dirt forced in there can disrupt its signal. So keep rotary (turbo) nozzles out of the wheel well altogether. A flat fan nozzle at 25 to 40 degrees spreads the force over a wide area and is plenty for the wheel arch.
4. Dried-on cleaner leaves permanent marks on the arch lip
A strong alkaline cleaner can be left to work in the wheel arch, but it must never dry on, because dried residue leaves pale marks on plastic and paint that are very hard to remove.
The wheel well needs a cleaner with some bite, because greasy road film, brake dust and oil all mix together in there. The TUGA Chemie Teufels-Reiniger® Universal Cleaner 1000 ml / 1 Liter is a highly alkaline all-purpose cleaner with a pH of 10.5 to 11.8. The alkaline environment chemically breaks grease down into water-soluble soaps, and the surfactants wrap up the loosened dirt. What that means for you: once sprayed on, the grey film on the wheel arch liner visibly runs off in streaks instead of just getting smeared around.
That same strength is also the reason for the limit. The manufacturer specifies a strict dwell time of no more than 3 minutes, because drying silicates leave APC spots: pale, matt marks that no cleaner will fully remove. For the wheel well, dilute the Teufels-Reiniger 1:5 to 1:10, spray it onto the cool surface from 20 to 30 cm and work one side at a time: spray, brush, rinse, before you move on to the next wheel. Keep it off unprotected aluminium, so skip any suspension parts in bare alu.
So plan the wash around the weather. In full sun or a warm breeze the cleaner dries on within minutes, while on a cool, overcast day you get the full time. Get the cleaner, pump sprayer and brush ready today and just use the next dry, cool day this week.
The same goes for straight after a drive. Brakes and suspension are still warm, and on hot parts the water in the cleaner flashes off instantly, so the concentrated chemicals literally bake on. Let the car stand for half an hour after driving and check with your hand on the arch lip that everything has cooled down. In frost, don't wash at all: below freezing the rinse water freezes in the flanges and door seals, and the cleaner is much weaker in the cold anyway.

5. A wire brush tears open the stone chip protection in the wheel well
Go at stubborn dirt or the first surface rust in the wheel arch with a wire brush, and you take the stone chip and underbody protection off with it and open the way for rust into the metal.
Under the wheel arch liner and on the arch lip, an elastic layer of underbody protection or wax shields the metal from the stones the tyre kicks up. That layer is softer than wire. A wire brush tears it open, and wherever it's exposed, salty water hits the metal directly. You often only see the result one or two winters later as rust bubbles on the arch lip, and by then it's no longer a care job but one for the paint specialist.
Plastic bristles are all you need in the wheel arch, because the chemicals loosen the dirt, not the brush. The detailing brush only finishes off what the cleaner has already loosened. Stubborn tar spots on suspension parts get a tar remover, left to dwell for 5 to 10 minutes and then taken off with a soft detailing brush.
If you can already see rust on the arch lip, cleaning is still the right call, just as a stocktake. Once it's clean you can see how far it goes. Anything beyond loose surface rust belongs with a bodywork specialist, because with a brush and sandpaper on the car you'll usually make it worse.
Four tools cover all five points
For a winter-ready wheel well you need a strong cleaner, a matching pump sprayer, a long detailing brush and a trim dressing that protects the result once it's dry.
The TUGA Chemie Teufels-Reiniger® cuts through the greasy grime in the wheel well. As a concentrate it goes a long way: at 1:10 the 5-litre canister makes about 55 litres of working solution, and the 1-litre bottle covers plenty of wheel arches. You know its limits now: 3 minutes max, never in the sun, never on bare alu. If you want to clean more gently on a regular basis, our All-purpose cleaner / APC category has milder alternatives.
The solo CLEANLine (303 A / B) Pump Sprayer 1.25 Litre in the alkaline 303 B lays the cleaner down in a controlled way. At 1.25 litres, one fill easily covers all four wheel arches. Getting the right version matters, because there's the 303 A with different seals for acidic wheel cleaners, and the two shouldn't be mixed up with the same chemicals.
The Koch-Chemie Wheel & Engine Brush 75 x 420 mm reaches the edge and the liner behind the wheel. Grab the shorter 50 x 420 mm for tight spots around the strut. You'll find more shapes under Brushes & detailing brushes. Last of all, the Dr. Wack "A1" Kunststoff-Tiefenpfleger trim care 250 ml goes onto the dry, clean wheel arch liner. A few sprays onto the cloth, never straight onto the part, wait 5 minutes, then buff dry. According to user reports it lasts 2 to 3 months and means the next lot of slush rinses off more easily. Keep it off the tyre tread.
If you're doing the wheels at the same time, read our post on how to remove baked-on brake dust before the road salt arrives first, and for the inside of the wheel, the overview of which wheel brush suits which zone helps.

Jasper's pro tip: After the second rinse, do the glove test. Run your gloved index finger once along the inside of the arch lip, front to back, while everything is still wet. If your finger comes back grey, there's still dirt in the flange that you'd never have spotted wet, and that leftover is exactly what holds salty water in place over winter. I do this on all four wheels, it takes less than two minutes and saves you the grey line that otherwise comes back as it dries.
No time for the whole post? Get it summarized: